Dependency injection (DI) is a design pattern and programming technique to manage dependencies between different components.
依赖注入(DI)是一种用于管理不同组件之间依赖关系的设计模式和编程技术。
In DI, the dependencies of a class or other dependent component are constructed and provided from outside (injected) rather that begin created by depended component.
在 DI 中,类或其他依赖组件的依赖关系是从外部构造和提供(注入)的,而不是由依赖组件开始创建的。
Understanding dependency injection is key to following the dependency inversion principle.
了解依赖注入是遵循依赖倒置原则的关键。

Core components 核心部件
The three main components of Dependency Injection are:
依赖注入的三个主要组成部分是:
- Dependency: A dependency is an object or service that another class relies on to perform its tasks. It represents a contract or interface that defines the required functionality.
依赖关系:依赖关系是另一个类依赖于执行其任务的对象或服务。它代表定义所需功能的契约或接口。 - Client: The dependent class, also known as the client class, is the class that relies on dependency to fulfill its functionality. It typically declares a dependency through constructor parameters, setter methods, or interface contracts.
客户端:依赖类,也称为客户端类,是依赖依赖来实现其功能的类。它通常通过构造函数参数、setter 方法或接口契约来声明依赖关系。 - Injector: The injector (aka container, assembler, factory) is responsible for creating and managing the dependencies and injecting them into the dependent class (client). The injector can be a framework or container provided by a DI library, or it can be a custom implementation.
注入器:注入器(又名容器、汇编器、工厂)负责创建和管理依赖项并将它们注入到依赖类(客户端)中。注入器可以是 DI 库提供的框架或容器,也可以是自定义实现。
These three components work together to enable the benefits of DI, such as loose coupling, modularity, testability, and flexibility.
这三个组件协同工作以实现 DI 的优势,例如松散耦合、模块化、可测试性和灵活性。
The dependent class relies on the injector or container to provide the required dependencies, and the dependencies themselves are defined as contracts or interfaces, allowing for interchangeable implementations. This separation of concerns and inversion of control leads to more maintainable and scalable code.
依赖类依赖于注入器或容器来提供所需的依赖项,并且依赖项本身被定义为契约或接口,从而允许可互换的实现。这种关注点分离和控制反转导致代码更易于维护和扩展。
Implementation 执行
As an example, let’s consider two classes: Engine and Car.
作为示例,让我们考虑两个类:Engine 和 Car。
To construct an instance of the Car class, we need an appropriate Engine object.
为了构造 Car 类的实例,我们需要一个适当的 Engine 对象。
class Engine {
  private horsepower: number;
  private fuelType: string;

  constructor(horsepower: number, fuelType: string) {
    this.horsepower = horsepower;
    this.fuelType = fuelType;
  }

  public start() {
    console.log(`Engine started. Horsepower: ${this.horsepower}, Fuel Type: ${this.fuelType}`);
  }

  public stop() {
    console.log("Engine stopped.");
  }
}

class Car {
  private engine: Engine;
  private brand: string;
  private model: string;

  constructor(brand: string, model: string) {
    this.brand = brand;
    this.model = model;
    this.engine = new Engine(200, "Gasoline");
  }

  public startCar() {
    console.log(`Starting ${this.brand} ${this.model}`);
    this.engine.start();
  }

  public stopCar() {
    console.log(`Stopping ${this.brand} ${this.model}`);
    this.engine.stop();
  }
}

// Example usage
const car = new Car("Toyota", "Camry");

car.startCar();
car.stopCar();

// To consturct a car with Gasoline engine required a manual edit of Car class
For now, it works fine, except if we need to pass different parameters to the Engine class, it’s required a manual edit.
目前,它工作得很好,除非我们需要将不同的参数传递给 Engine 类,否则需要手动编辑。
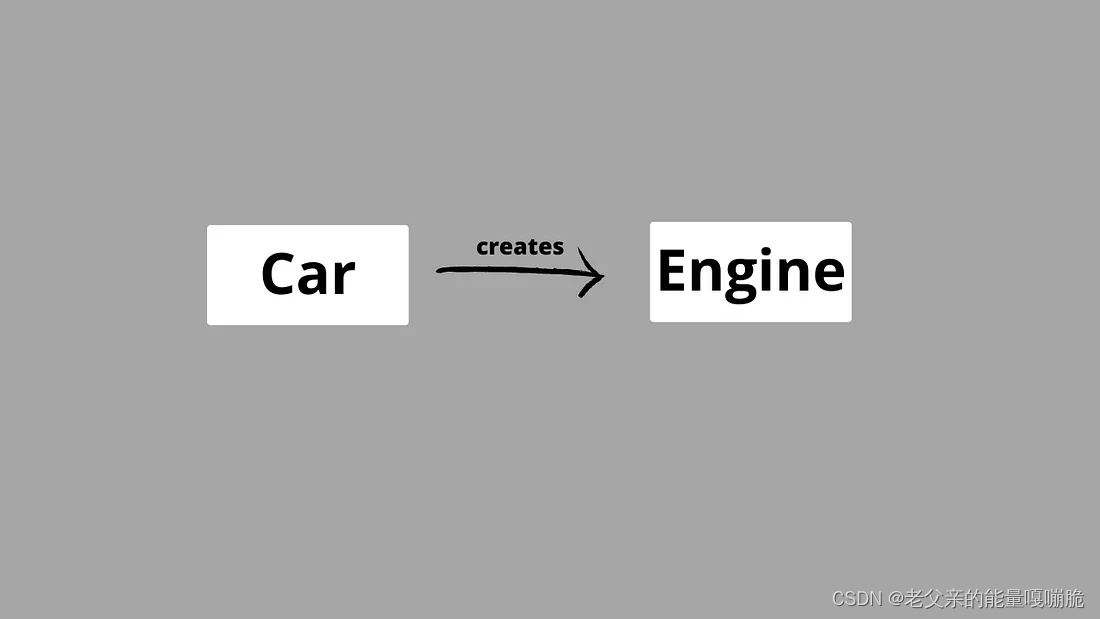
Map of dependencies between the Car and Engine classes
Car 和 Engine 类之间的依赖关系图
Parameters injection 参数注入
To resolve such a problem we can take advantage of parameters injection. Let’s rewrite the current code.
为了解决这样的问题,我们可以利用参数注入。让我们重写当前的代码。
class Engine {
  // same implementation
}

class Car {
  private engine: Engine;
  private brand: string;
  private model: string;

  constructor(brand: string, model: string, horsepower: number, fuelType: string) {
    this.brand = brand;
    this.model = model;
    this.engine = new Engine(horsepower, fuelType);
  }

  public startCar() {
    console.log(`Starting ${this.brand} ${this.model}`);
    this.engine.start();
  }

  public stopCar() {
    console.log(`Stopping ${this.brand} ${this.model}`);
    this.engine.stop();
  }
}

// Example usage
const car1 = new Car("Toyota", "Camry", 200, "Gasoline");

car1.startCar();
car1.stopCar();

// Easy change Engine parameters
const car2 = new Car("BMW", "X5", 300, "Diesel");

car2.startCar();
car2.stopCar();
Now the general logic does not change; instead, we can easily make changes according to our needs.
现在总体逻辑没有改变;相反,我们可以根据需要轻松进行更改。
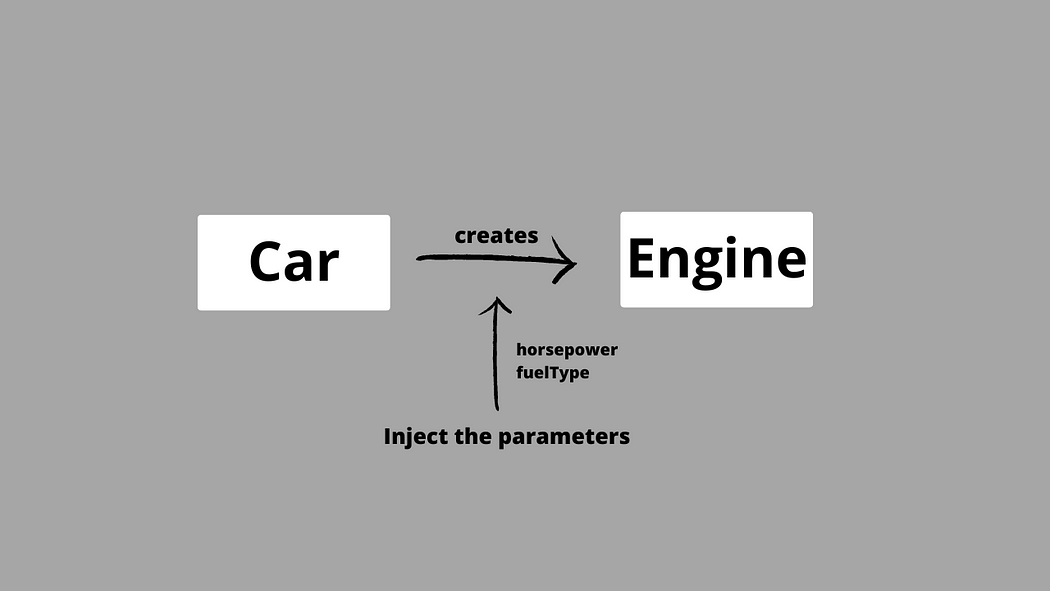
Map of dependencies between the Car and Engine classes
Car 和 Engine 类之间的依赖关系图
Constructor/setter injection
构造函数/设置器注入
In the previous example, we used parameter injection to change horsepower and fuelType for Engine class. However, it may become cumbersome when dealing with a large number of dependencies.
在前面的示例中,我们使用参数注入来更改 Engine 类的 horsepower 和 fuelType 。然而,当处理大量依赖项时,它可能会变得很麻烦。
To make these 2 classes more flexible to change and testing, it is customary to create the necessary dependency outside the dependent class. You can attain this outcome by utilizing a constructor or setter injection.
为了使这两个类更灵活地更改和测试,通常在依赖类之外创建必要的依赖项。您可以通过使用构造函数或设置器注入来实现此结果。
class Engine {
  // same implementation
}

class Car {
  private engine: Engine;
  private brand: string;
  private model: string;

  constructor(brand: string, model: string, engine: Engine) {
    this.brand = brand;
    this.model = model;
    this.engine = engine;
  }

  public startCar() {
    // same logic
  }

  public stopCar() {
    // same logic
  }
}

// Example usage
const gasolineEngine = new Engine(200, "Gasoline");
const car1 = new Car("Toyota", "Camry", gasolineEngine);

car1.startCar();
car1.stopCar();

// Easy change Engine parameters
const dieselEngine = new Engine(300, "Diesel");
const car2 = new Car("BMW", "X5", dieselEngine);

car2.startCar();
car2.stopCar();
By removing the responsibility of creating the engine instance from the Car class, you adhere to the Single Responsibility Principle. The Car class should focus on its own responsibilities related to the car's behavior, while the engine creation and configuration can be handled in a different part of the code.
通过从 Car 类中删除创建引擎实例的责任,您可以遵守单一责任原则。 Car 类应该专注于其自身与汽车行为相关的职责,而引擎的创建和配置可以在代码的不同部分中处理。
The same realization, but using setter injection:
相同的实现,但使用 setter 注入:
class Engine {
  // same implementation
}

class Car {
  private brand: string;
  private model: string;
  private engine: Engine;

  constructor(brand: string, model: string) {
    this.brand = brand;
    this.model = model;
  }

  public setEngine(engine: Engine) {
    this.engine = engine;
  }

  public startCar() {
    // same logic
  }

  public stopCar() {
    // same logic
  }
}

// Example usage
const gasolineEngine = new Engine(200, "Gasoline");
const car1 = new Car("Toyota", "Camry");
car1.setEngine(gasolineEngine);

car1.startCar();
car1.stopCar();


const dieselEngine = new Engine(300, "Diesel");
const car2 = new Car("BMW", "X5");
car2.setEngine(dieselEngine);

car2.startCar();
car2.stopCar(); 
Map of dependencies between the Car and Engine classes
Car 和 Engine 类之间的依赖关系图
Interface injection 接口注入
Right now, the current implementation of Car is tied to a specific Engine class. This can be a problem if individual instances of the Engine class requires different logic.
现在, Car 的当前实现与特定的 Engine 类相关联。如果 Engine 类的各个实例需要不同的逻辑,这可能会出现问题。
To make the Engine and Car classes more loosely coupled, we can bind Car to an interface (or abstract class as an interface) instead of a specific child Engine class.
为了使 Engine 和 Car 类更加松散耦合,我们可以将 Car 绑定到接口(或作为接口的抽象类)而不是特定的子 < b3> 类。
interface Engine {
  start(): void;
  stop(): void;
}

class GasolineEngine implements Engine {
  private horsepower: number;
  private fuelType: string;

  constructor(horsepower: number) {
    this.horsepower = horsepower;
    this.fuelType = "Gasoline";
  }

  public start() {
    console.log(`Gasoline engine started. Horsepower: ${this.horsepower}`);
  }

  public stop() {
    console.log("Gasoline engine stopped.");
  }
}

class DieselEngine implements Engine {
  private horsepower: number;
  private fuelType: string;

  constructor(horsepower: number) {
    this.horsepower = horsepower;
    this.fuelType = "Diesel";
  }

  public start() {
    console.log(`Diesel engine started. Horsepower: ${this.horsepower}`);
  }

  public stop() {
    console.log("Diesel engine stopped.");
  }
}

class Car {
  private engine: Engine;
  private brand: string;
  private model: string;

  // class Car expect any valid Engine implementation
  constructor(brand: string, model: string, engine: Engine) {
    this.brand = brand;
    this.model = model;
    this.engine = engine;
  }

  public startCar() {
    // same logic
  }

  public stopCar() {
    // same logic
  }
}

// Example usage
const gasolineEngine = new GasolineEngine(200);
const car1 = new Car("Toyota", "Camry", gasolineEngine);

car1.startCar();
car1.stopCar();

const dieselEngine = new DieselEngine(300);
const car2 = new Car("BMW", "X5", dieselEngine);

car2.startCar();
car2.stopCar();
Now the Car class is decoupled from the specific implementation of the Engine class. This allows you to easily substitute different engine types without modifying the Car class itself.
现在, Car 类与 Engine 类的具体实现解耦了。这使您可以轻松替换不同的引擎类型,而无需修改 Car 类本身。
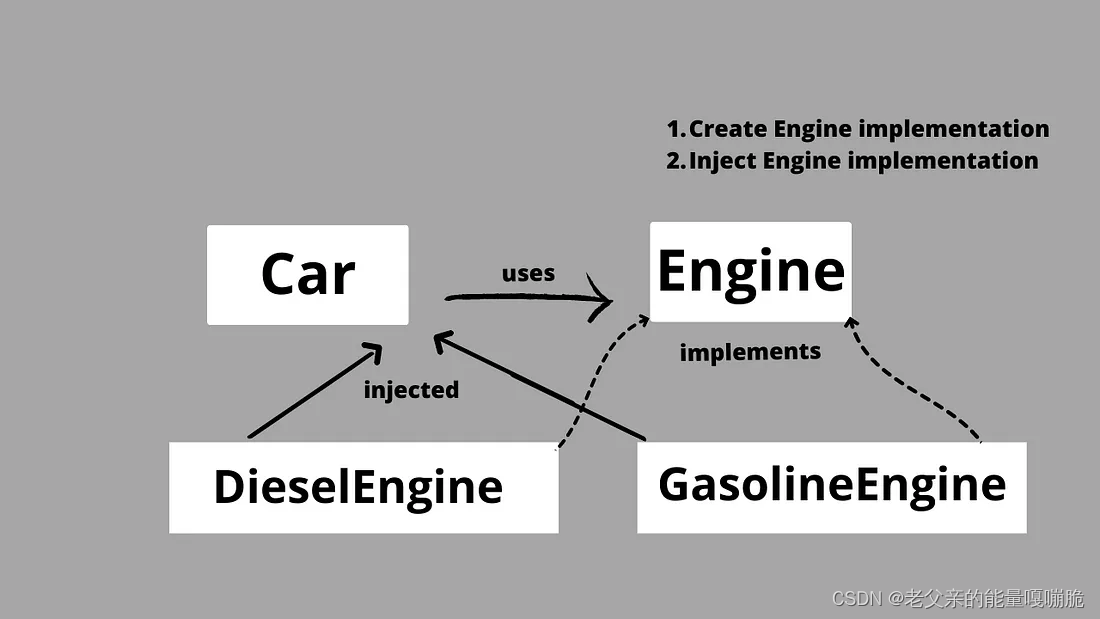
Map of dependencies between the Car and Engine classes
Car 和 Engine 类之间的依赖关系图
Injectors 喷油器
So far, I’ve been talking only about dependencies and clients.
到目前为止,我只讨论依赖项和客户端。
Manual creation of dependencies can be painful. Especially if there are multiple levels of nesting. That’s where injectors come in.
手动创建依赖项可能会很痛苦。特别是当有多层嵌套时。这就是注射器发挥作用的地方。
The injector resolves the dependencies and provides them to the client class. You can create your own algorithm for registering and injecting dependencies, or you can use DI containers or DI frameworks that will do this for you.
注入器解析依赖关系并将它们提供给客户端类。您可以创建自己的算法来注册和注入依赖项,也可以使用 DI 容器或 DI 框架来为您执行此操作。
Examples for JavaSript/TypeScript are InversifyJS, Awilix, TypeDI, and NestJS, for C# — ASP.NET Core Dependency Injection, Java — Spring Framework, and Go — Google Wire.
JavaSript/TypeScript 的示例包括 InversifyJS、Awilix、TypeDI 和 NestJS,C# — ASP.NET Core 依赖注入、Java — Spring Framework 和 Go — Google Wire。
Let’s rewrite the last implementation with an interface injection using the TypeDI container:
让我们使用 TypeDI 容器通过接口注入重写最后一个实现:
import { Service, Inject, Container } from 'typedi';
import 'reflect-metadata';

interface Engine {
  start(): void;
  stop(): void;
}

@Service()
class GasolineEngine implements Engine {
  private horsepower: number;
  private fuelType: string;

  constructor(@Inject('horsepower') horsepower: number) {
    this.horsepower = horsepower;
    this.fuelType = 'Gasoline';
  }

  start() {
    console.log(`Gasoline engine started. Horsepower: ${this.horsepower}`);
  }

  stop() {
    console.log('Gasoline engine stopped.');
  }
}

@Service()
class DieselEngine implements Engine {
  private horsepower: number;
  private fuelType: string;

  constructor(@Inject('horsepower') horsepower: number) {
    this.horsepower = horsepower;
    this.fuelType = 'Diesel';
  }

  start() {
    console.log(`Diesel engine started. Horsepower: ${this.horsepower}`);
  }

  stop() {
    console.log('Diesel engine stopped.');
  }
}

@Service()
class Car {
  private engine: Engine;
  private brand: string;
  private model: string;

  constructor(@Inject('brand') brand: string, @Inject('model') model: string, @Inject('engine') engine: Engine) {
    this.brand = brand;
    this.model = model;
    this.engine = engine;
  }

  public startCar() {
    console.log(`Starting ${this.brand} ${this.model}`);
    this.engine.start();
  }

  public stopCar() {
    console.log(`Stopping ${this.brand} ${this.model}`);
    this.engine.stop();
  }
}

// Register dependencies with the container
Container.set('horsepower', 200);
Container.set('brand', 'Toyota');
Container.set('model', 'Camry');
Container.set({ id: 'engine', type: GasolineEngine });
Container.set({ id: Car, type: Car });

Container.set('horsepower', 300);
Container.set('brand', 'BMW');
Container.set('model', 'X5');
Container.set({ id: 'engine', type: DieselEngine });
Container.set({ id: Car, type: Car });

// Example usage
const car1 = Container.get(Car);
car1.startCar();
car1.stopCar();

const car2 = Container.get(Car);
car2.startCar();
car2.stopCar();

// console.log:
Starting Toyota Camry
Gasoline engine started. Horsepower: 200
Stopping Toyota Camry
Gasoline engine stopped.
Starting BMW X5
Diesel engine started. Horsepower: 300
Stopping BMW X5
Diesel engine stopped.
Using a DI container simplifies dependency and client management. This not only allows you to create a complex dependency graph but also makes it easy to test components with stubs and mocks.
使用 DI 容器可以简化依赖性和客户端管理。这不仅允许您创建复杂的依赖关系图,还可以轻松地使用存根和模拟来测试组件。
Conclusion 结论
In summary, Dependency injection is a valuable technique for designing flexible, modular, and testable software systems. It promotes loose coupling, enhances code reusability, and simplifies the configuration and management of dependencies.
总之,依赖注入是设计灵活、模块化和可测试的软件系统的一项有价值的技术。它促进松散耦合,增强代码可重用性,并简化依赖项的配置和管理。
By adopting DI, you can write more maintainable, scalable, and robust applications.
通过采用 DI,您可以编写更可维护、可扩展且健壮的应用程序。
References: 参考:
- Wikipedia: Dependency injection
维基百科:依赖注入 - Martin Fowler: Inversion of Control Containers and the Dependency Injection pattern
Martin Fowler:控制容器反转和依赖注入模式
Thank you for reading this article! If you have any questions or suggestions, feel free to write a comment.
感谢您阅读这篇文章!如果您有任何疑问或建议,请随时发表评论。